Showing posts with label bees. Show all posts

Saturday, April 20, 2019

2019-04-20: Hiving two packages of bees.

I had a couple of years with no bees.  First, I did not find out that they had died over the winter a couple of years ago until it was too late to order new bees.  Then, it sort of slipped my mind last spring.

So, this year, I ordered two packages from my usual supplier, Nature's Nectar.  I had one package each of Carniolan Honeybees and Italian Honeybees.  I did not really care which bees I got, but I usually do not get two of the same subspecies.

This was the first year that my packages were plastic.  I like the old wood and metal screen ones better, since I can see the bees easier.  I also would learn that it was easier to spray the bees with sugar water through the metal screen compared to the plastic packaging.

It was about a two-hour drive home, but the weather was mild; the bees probably did not get too hot.

I picked up the bees at 0915, but they suggest that you do not hive them until the evening.  So, they sat in the cool garage for most of the day.  I sprayed them with sugar water once to feed, calm, and cool them.

Finally, 1800 arrived, and we were ready to hive the bees.


I have the two packages of bees, and I'm wearing my bee suit.  If you watch other people's videos, they often don't wear a bee suit.  The reason is that the bees do not have a hive to protect, so they tend to be more docile.


Here I am with my helper, Vaughn.  I'm having some difficulty uploading the videos, so I'll outline the steps that we did:
  1. The syrup-soaked bees will be "poured" into the center of the bottom (and--at this time--only) hive body, so we removed the center four or so frames.
  2. Plug the entrance with the entrance reducer on the smallest setting and block that temporarily with a wad of prairie grass.
  3. Soak the bees well with syrup from the spray bottle.
  4. Use the hive tools to pry the metal can from the package.  (This is the syrup the bees ate during their trip from CA to MN and then from Stillwater to me.)
  5. Once the can is out, spray the bees some more.
  6. Remove the queen's cage (she is transported separately) and set it aside.
  7. Knock the bees to the bottom of their package by striking the package against the ground.
  8. Pour the syrup-soaked bees into the hive.
  9. Leave the mostly-empty package near the entrance so the bees can eventually get into there (the bees will probably push the grass out of the hole over the evening).
  10. Take the wood cork out of the queen's cage, and replace it with a mini-marshmallow.
  11. Put a pollen patty on the top of the frames for the bees to eat until they can bring in a good supply of pollen from plants.
  12. Put on the inner cover (the board with an oblong hole in it).
  13. Put the feeder pail over that hole so that the bees can feed from that until they are able to bring in nectar from flowers.
  14. Put an empty hive body over the pail.
  15. Put the outer cover over the empty hive body.
The next step, which we will probably do tomorrow, is to check the queen's cage.  Ideally, the marshmallow will have been eaten by the bees so that the queen can exit the cage and start laying eggs.

Saturday, April 4, 2015

New bee arrival date; hives ready.

The bees now arrive on April 18, 2015.  The distribution center is Nature's Nectar in Stillwater.  Pick-up day is very busy, and Nature's Nectar used to have certain times that you could arrive--depending on your last name.  If you are far enough away (as I am), I think you can show up whenever you are able.

The hives for spring 2015:  Langstroth (Hive A), a Kenyan top-bar hive (Beta), and another Langstroth (Hive B)

The hives are ready to go.  I had to (or decided to) throw away many frames after my bees died during the winter of '13 - '14.  I believe that they just died from a cold snap and not from any diseases.  There was some rotting of the bees and many of the frames were, I though, no longer useful.

So, I'll need to order about 100+ frames, I think.  Both A1 and B1 need new frames.  Also, as I might show you in an upcoming post, I think that Beta is going to also use those frames.

I have some pollen patties from the first season that I had the bees, 2013.  They've been in the refrigerator since then.  They may still be good, but I don't know how to determine that, frankly...

I'm also struggling with how I'll feed syrup to the bees in Beta.  I may have to use an external feeder and just hope that A1 and B1 leave that syrup alone once they find their own syrup in their hives.

Thursday, August 1, 2013

Flowers and bees on flowers.

Our prairie and homesite has many flowers for the bees...

Common Milkweed in bloom

Large patch of Blackeyed Susans

Honeybee on Blackeyed Susan

Honeybee on Blackeyed Susan, closer

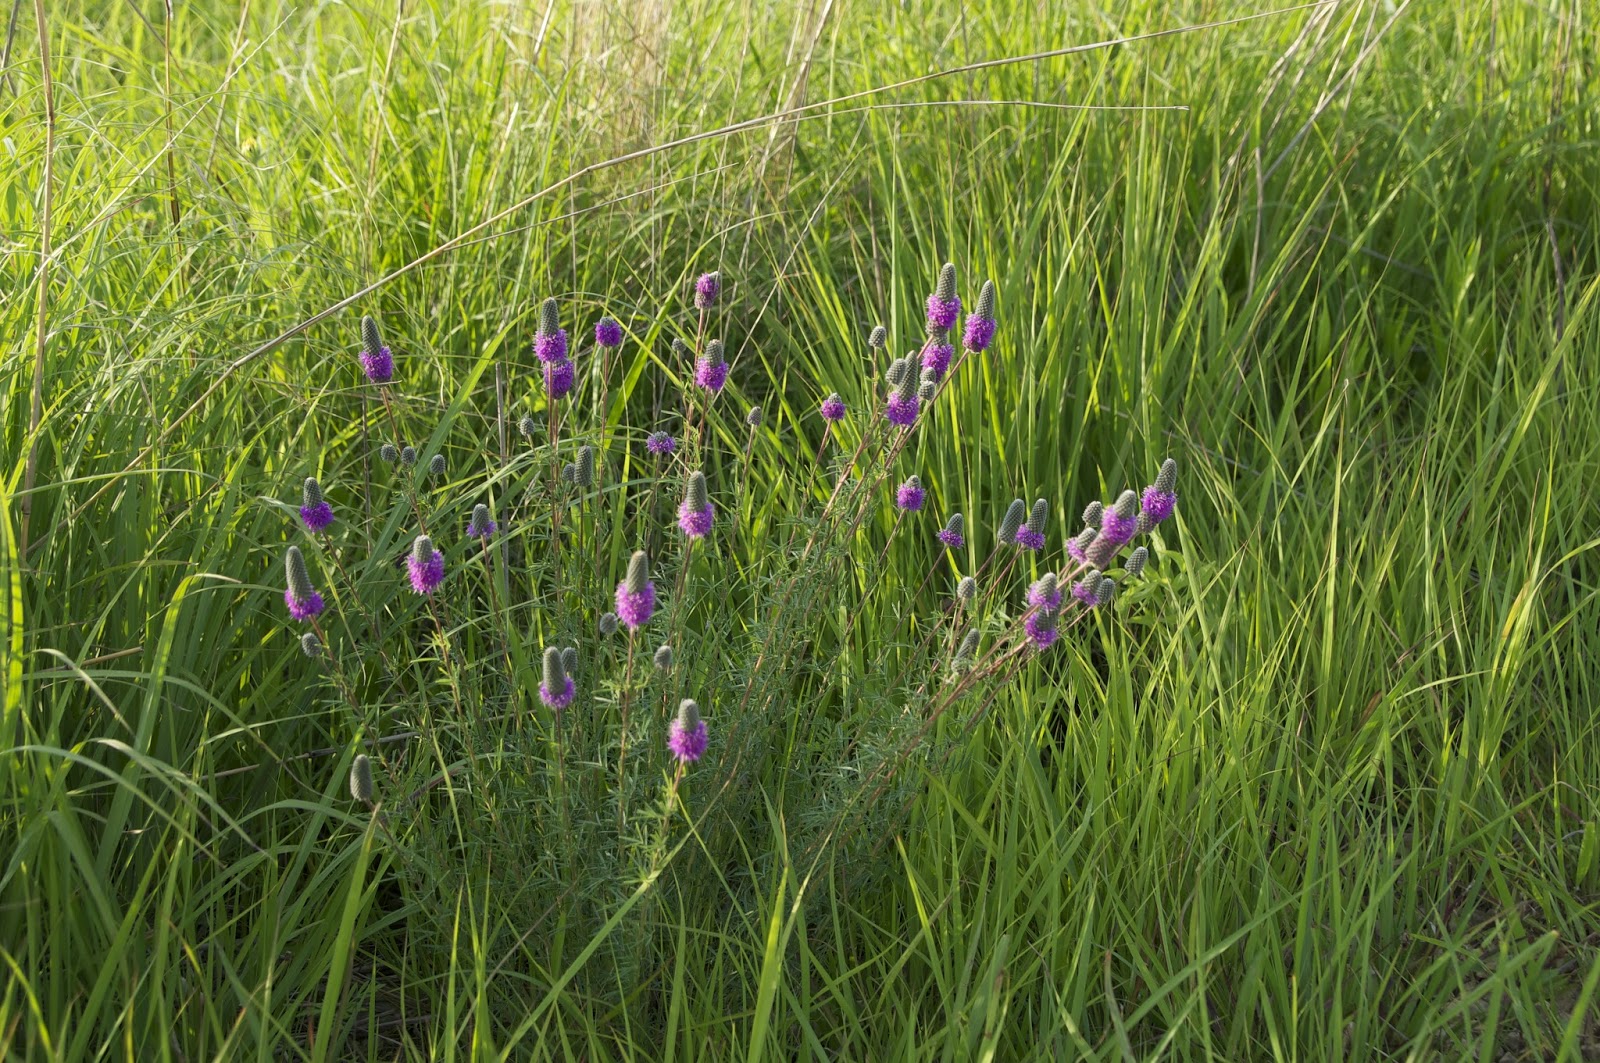
Purple Prairie Clover

Purple Prairie Clover, closer

Prairie False Indigo in bloom

Prairie False Indigo in fruit

Closer view of Prairie False Indigo fruit

Blue Vervain or Hoary Vervain, not sure which...

First inspection with two boxes on each hive, part 2.

Fourth inspection of Hive A and Hive B, Sunday, 6/16/13:
[Note:  This is follow-up to the July 7, 2013 post, with video links below.]

To recap, this was day 43 for the hives, with the packages having been installed Saturday the 4th of May, 2013.  We were able to do a full inspection today, as the weather was in the mid-70's.  The inspection started at about 1820.  There were two boxes on each hive, and I felt a bit more rushed for time.  But, overall it went well.  Inspection ended at 1850.

The videos (part 1 and part 2) tell most of the tale.  It was fun to see the bees moving into their second box and drawing out more comb.  With how much wax they were making (and how little syrup they were taking in), they were clearly finding a great deal of nectar in the wild.

Saturday, June 1, 2013

A Minnesota Solitary Bee, the "Metallic Green Bee."

On my way to the beehives this afternoon, I spotted what I thought of, in general, as a "solitary bee."  I believe that this is a metallic green bee.  That seems to be a general name for a dozen or so bees that fit that overall description.  From the range, description, size, and the like, I believe that this particular metallic green bee is Agapostemon virescens.

Click to enlarge.

Click to enlarge.

I deemed that this nasty creature was stealing precious nectar and pollen that should have been going to my honeybees.  So, shortly after these photos were taken, I crushed the metallic green bee that you see above.*

I also saw many bumblebees, but haven't yet snapped a good photo of them.

* = I am, of course, joking.  The non-native honeybee and the native bees generally live in harmony together.  They tend to not displace or harm one another.  The metallic green bee above was left alone to do his/her business.

Tuesday, May 28, 2013

Bees on flowers.

First, an update regarding the inspection.  It was too cold this weekend to do an inspection.  I've delayed it until tomorrow, hoping that the weather will be warmer, if not sunnier.

As Konrad and I were walking the field this afternoon, we started to see bees on flowers.  So far, it is only the Dandelions that are blooming in the field.  Once we saw the bees on the Dandelions, it was hard to miss them.  I assume that they are "our" bees.

The pictures below are just from my iPhone 4S.  It was pretty neat to see, for the first time, our bees on flowers doing their business.

Worker bee on a Dandelion.  Click to enlarge.

A different worker bee on a different Dandelion.

My only worry is that I haven't yet added a second hive body.  If they are cramped for space, they might be more likely to abscond or swarm.  Either way, I would hate to be the main factor in limiting their colony growth.  So, unless the weather is absolutely terrible tomorrow, I'm going to get out there and do an inspection.  I'll replace the feeder pails and also add a hive body to each as needed.

Tuesday, May 14, 2013

No pollen sources yet?

Last night, at 2030, the bees were still pretty active.  It got to 73 degrees in our area.  I watched the hives for about 5 minutes, and I didn't see any pollen coming in.  It's certainly possible that I missed it, or that it was not colorful enough for me to easily see it on the back legs of the incoming bees.

Yet, when I got up this AM, I see one of the weather apps on my iPhone has a "severe" warning for tree pollen counts, for allergy sufferers.  It's going to be 90+ degrees today, so after I get home this evening, I'll check the bees's pollen baskets on their hind legs.

For now, the pollen patties will keep going on the hives as long as the bees are using them.

Saturday, May 11, 2013

Between day 1 and day 8.

As I write this on May 7, 2013, it is day 3 for the hives.  Over the past two days, it seems that Hive B has been more active.  I'm still quite a novice, so I'm not going to make much of this difference.  There are just more bees going in and out of Hive B compared to Hive A.  None of the bees has any pollen on their legs that I can see.  However, there aren't really any flowers out of significance.  The forests around here have some spring ephemerals blooming, but there isn't a great number of them.

Now, for this paragraph, it is May 11, and I plan to inspect the hives tomorrow.  I have given the smoker a test run with cypress animal bedding, and this worked very well.  It burned a bit fast, still, so I will likely bring extra out to the apiary with me (along with a lighter).

The past several days have brought cold temperatures.  In the evenings, it has been in the low 40's to even an upper-30 degree night.  The days have not been very warm.  It was also very windy today, 5/11/2013.  The hives have not been very active.  I'm a bit worried about this, but not overly so.  When I sat to watch the hives, I'd see a few bees every minute.  Some returning, some leaving, some just poking their heads out of the entrance.  It was difficult to resist the urge to take a peek under the lid, to just see the activity (or lack thereof) inside the hives.

The activity difference between the two hives that I note on day 3 didn't really last past day 3 - 4.

My hope is that it has just been too cold/rainy/windy for the bees to do much foraging outside the hives.  Also, there are almost no flowers out yet.  Tomorrow will tell whether the hives are just normally inactive or whether there is a deeper problem...  Such as the queen(s) being gone, dead, or unproductive.

I have two new pails of sugar syrup mixed up.  I'll take them out of the refrigerator tomorrow so that they are warmed for the bees by the time of the afternoon inspection.  The pails that are currently on the hives (one each) might not be empty.  But, sugar is relatively cheap and I'd like to make sure that I'm not feeding the bees fermented sugar syrup.  I can only assume that drunk bees are more hostile and sting-happy than sober ones...

Returning to the hives on day 1.

I returned to the hives on May 5, 2013, Sunday afternoon.  It was warmer (mid-50's) and the hives were more active.  They appeared to be very similar to each other in activity.  I decided to take this as a good sign.  I figured:  If I did something wrong with one hive, it would appear to be different than the other hive.  I also thought it was pretty unlikely that I did something wrong with both hives...

Hive A, one day after installation of the package of bees and their Carniolan queen.

Hive B, one day after installation of the package of bees and their Italian queen.

Many bees were crawling in and out of the smallest hole in the entrance reducer.  Each hive had bees flying around in the front area.  Orientation flights, perhaps?  It was hard to tell whether any bees were flying out at a distance.  The hives are about 200 feet west of a pond.  That will likely be their main water source.  They can crawl down the cattails to access the water without falling in.

Here is a link to video 3 on YouTube.  There is no narration.  It is just a couple of minutes of video of each hive's entrance and the busy bees around that.

The goal for this trip was, of course, more video and pictures.  But, I also was to check the syrup feeders.  Ideally, they would be full yet, but with evidence of bees clustered underneath them, ingesting the syrup.  If they were empty, that would mean they leaked and were bathing the bees in copious amounds of 1:1 sugar syrup--not good.

This trip would require the smoker.  I should have better heeded the advice I read umpteen times, "Do a 'dry run' with your smoker."  My smoker came with free samples of some compressed wood bits.  Being used to a home pine incense log that I have, I expected these smoker pellets to burn very slowly (like over an hour or so).  I was wrong...  I ran out of smoke after the first hive.

Video 4 is on YouTube and shows the inspection of each hive.  I confirm that each hive has a nearly full pail of sugar syrup (so, it didn't leak).  Also, bees were clustered underneath the pail lid, taking sugar syrup.  These are each good signs.  I did not check the first hive's pollen patty, but the second one's patty was fresh and being eaten.  Lastly, each queen cage was free of marshmallow and it seemed that the queen had left.  There were a lot of workers in the queen cages yet (they could likely still smell her pheromones).  So, I left the queen cage in the hive, hoping that there would be fewer bees in it during the next inspection.  I'm not sure that this was the right thing to do.  Next time, I might leave it at the front entrance instead of above the inner cover by the feed pail as I did.

Speaking of the next inspection, I am to inspect the hives about 5 - 7 days after installation to see whether the queen seems to be laying eggs.  My goal is to ensure that the smoker works better next time (or that the person working the smoker is better-skilled next time!).

Tuesday, May 7, 2013

Installing packages of bees, x 2.

On Saturday, May 4, 2013, we installed two packages of bees into the hives.  To begin, we drove to Stillwater, MN.  This is the bee distribution point for my supplier.  He is very busy when the bees come.  They apparently come from CA to him, by the hundreds of packages.  You are given a time slot to arrive, based on last name.  It's all quite efficient.  Drive in, tell him your name, get the bees, and drive out.  The bees rode back to the apiary-to-be in the back of my parents's vehicle.  As they warmed up in the vehicle (they were being stored outside in about mid-40-degree weather), they became more active and noisy.

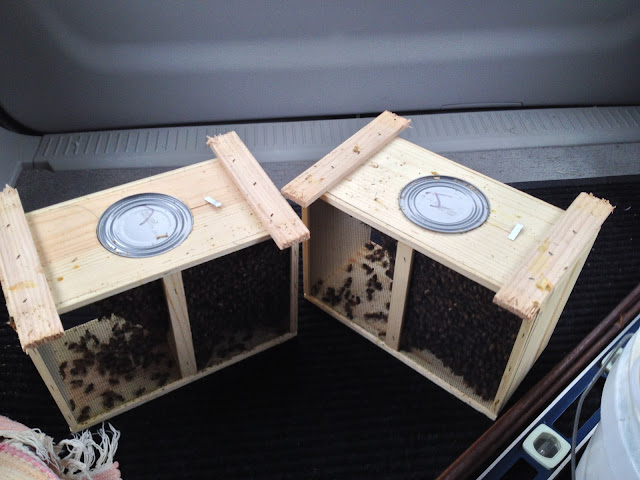
The two packages of bees.  The top of their feeder can is visible.  The bees are clustered on the right side of the packages, surrounding the queen that is in her own, smaller cage.

The two packages of bees are in the heated garage.

Since it was so cold, I had brought the empty hives into the heated garage the day before.  With the hives then warmed in the garage, I put the bees (still in their packages) into the hives.  This meant that I needed to remove the center 4 frames.  We walked the hives out to the site with the bees inside them.  I placed the hives on their stands.  Then, starting with Hive A, we installed the bees.

In our bee suits.  The beekeeper garb is warm enough that we are in shorts and t-shirts underneath, though the weather is in the mid-40's, temperature-wise.

For the installation of the packages into the hives, we had about 1/2-dozen hecklers (on-lookers and well-wishers, they called themselves).  The Carniolan queen package went into Hive A, and the Italian queen package, Hive B.  To my relatively untrained eye, they were very similar.  The Carniolan queen was darker in color, especially in the abdomen.

The installations went well overall, as far as I can tell.  As noted above, the temperature was in the mid-40's.  It was a mostly cloudy day.  Not too windy, especially where the hives are located (they have windbreaking trees to the North and the West).

Some of my on-lookers had suffered through hive installation videos on YouTube, per my request.  So, I had some help there.  Also, I had written up a "cheat sheet" beforehand that I gave to another.  I could request a prompt on the next step, as neeeded.

Hive A was first.  It was going to receive the Carniolan queen.  I won't bore you with the step-by-step.  There are videos linked to below.  We used the marshmallow method for the queen release.  The rest of the installation you can view via YouTube as Part 1 and Part 2.  The only thing that I did clearly wrong was failing to remove the queen and her cage from the larger cage before shaking the bees into Hive B.  Despite the vigorous jostling, she seemed to be fine.  The rest of the installation was the same with each hive and largely textbook.

Saturday, May 4, 2013

It's a girl!

Thousands of them, actually. The bee packages are in the back of the vehicle, and we are driving from the bee dealership back to home.

This is just a brief, mobile post. Hopefully, more information will follow in a later entry.